Making a golf ball in 3ds Max
This tutorial will teach you how to easily make a realistic golf ball in 3ds max. For this tutorial, you will need 3ds max 5+. You can try older versions, but you'll have to do things a little differently.
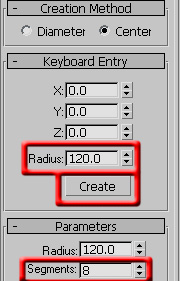
Essentially, we will take a sphere, add the little dents, and then smooth it out. Start out by creating a Geosphere that has 8 icosa segments. Make the radius a nice round number that you can remember (divisibility by 3 helps). You may find the keyboard entry section helpful.
Show All in your viewports (Z). Turn on Edged Faces by right-clicking the word Perspective. You should get something like this:

We will do all of our editing in Editable Mesh mode, so right-click the object and convert it into an editable mesh. Editable Mesh has a little special feature we will take full advantage of.
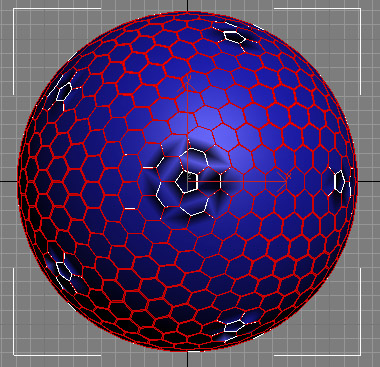
Now, select all the edges (2, Ctrl+A). Click the little text box besides chamfer, and put in 1/24 of your sphere's radius.

You should see what looks like a bunch of hexagons, with some messed up faces. Don't worry, it should turn out fine.
Now, be careful. Without unselecting anything (if you do you can undo with Ctrl+Z), go back into polygon sub-object mode. If you did it correctly, these faces will be selected.
We want the hexagons, not the edges, so go into Edit→Select Invert (Ctrl+I). Ta-da! Now all the selection is inverted and all the hexagons are selected. The rest is easy. In the extrude box, type in about 1/120 of your sphere's radius. Then in the bevel box, type in 1/30 of the radius.
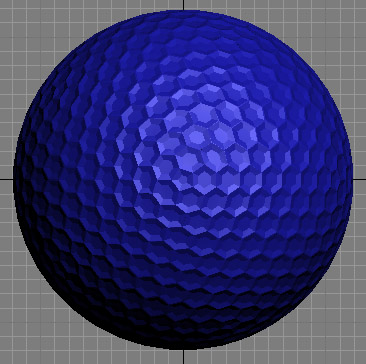
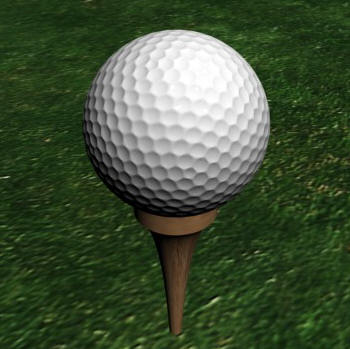
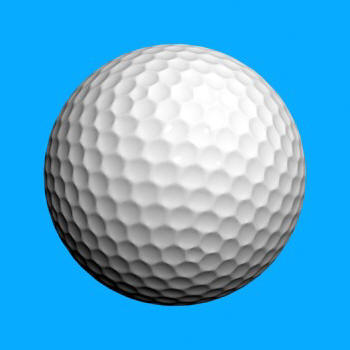
See? Golf ball. MeshSmoothing will double the number of polys, and make your model smoother. Just MeshSmooth it once, and you get a nice, smooth, golf ball ready for use in your animations. Slap on some simple grass, tee, and lights. Give it a shiny white material, and render!